Verbindung zu einem Space via WebDAV herstellen
Mit WebDAV kannst du OpenCloud-Spaces als Netzlaufwerke auf deinem Gerät einbinden und deine Dateien direkt über den Dateimanager verwalten – ganz ohne Browser.
Voraussetzungen
- Ein gültiges OpenCloud-Konto mit aktivierter WebDAV-Information in den Einstellungen
- Zugriff auf einen Space in OpenCloud
- Ein WebDAV-Client (z. B. integrierte Unterstützung des Betriebssystems oder Mountain Duck)
- (Optional, aber empfohlen) Ein App-Token
→ So erstellst du ein App-Token
Schritt-für-Schritt-Anleitung
WebDAV-Informationen in der Oberfläche aktivieren
Um die WebDAV-Informationen für deine Spaces anzuzeigen:
-
Gehe zu den Kontoeinstellungen
-
Aktiviere „WebDAV-Info in der Detailansicht anzeigen“

App-Token erstellen (falls erforderlich)
Einige WebDAV-Clients (insbesondere solche ohne OIDC-Unterstützung wie Mountain Duck) benötigen ein App-Token zur Authentifizierung.
Wir empfehlen aus Sicherheitsgründen die Verwendung eines App-Tokens anstelle deines Passworts.
- Gehe zu Einstellungen > App-Tokens
- Klicke auf „+ Neu“, gib einen Namen ein und wähle ein Ablaufdatum
- Kopiere den Token sofort – er wird nur einmal angezeigt
→ Siehe App-Token-Anleitung
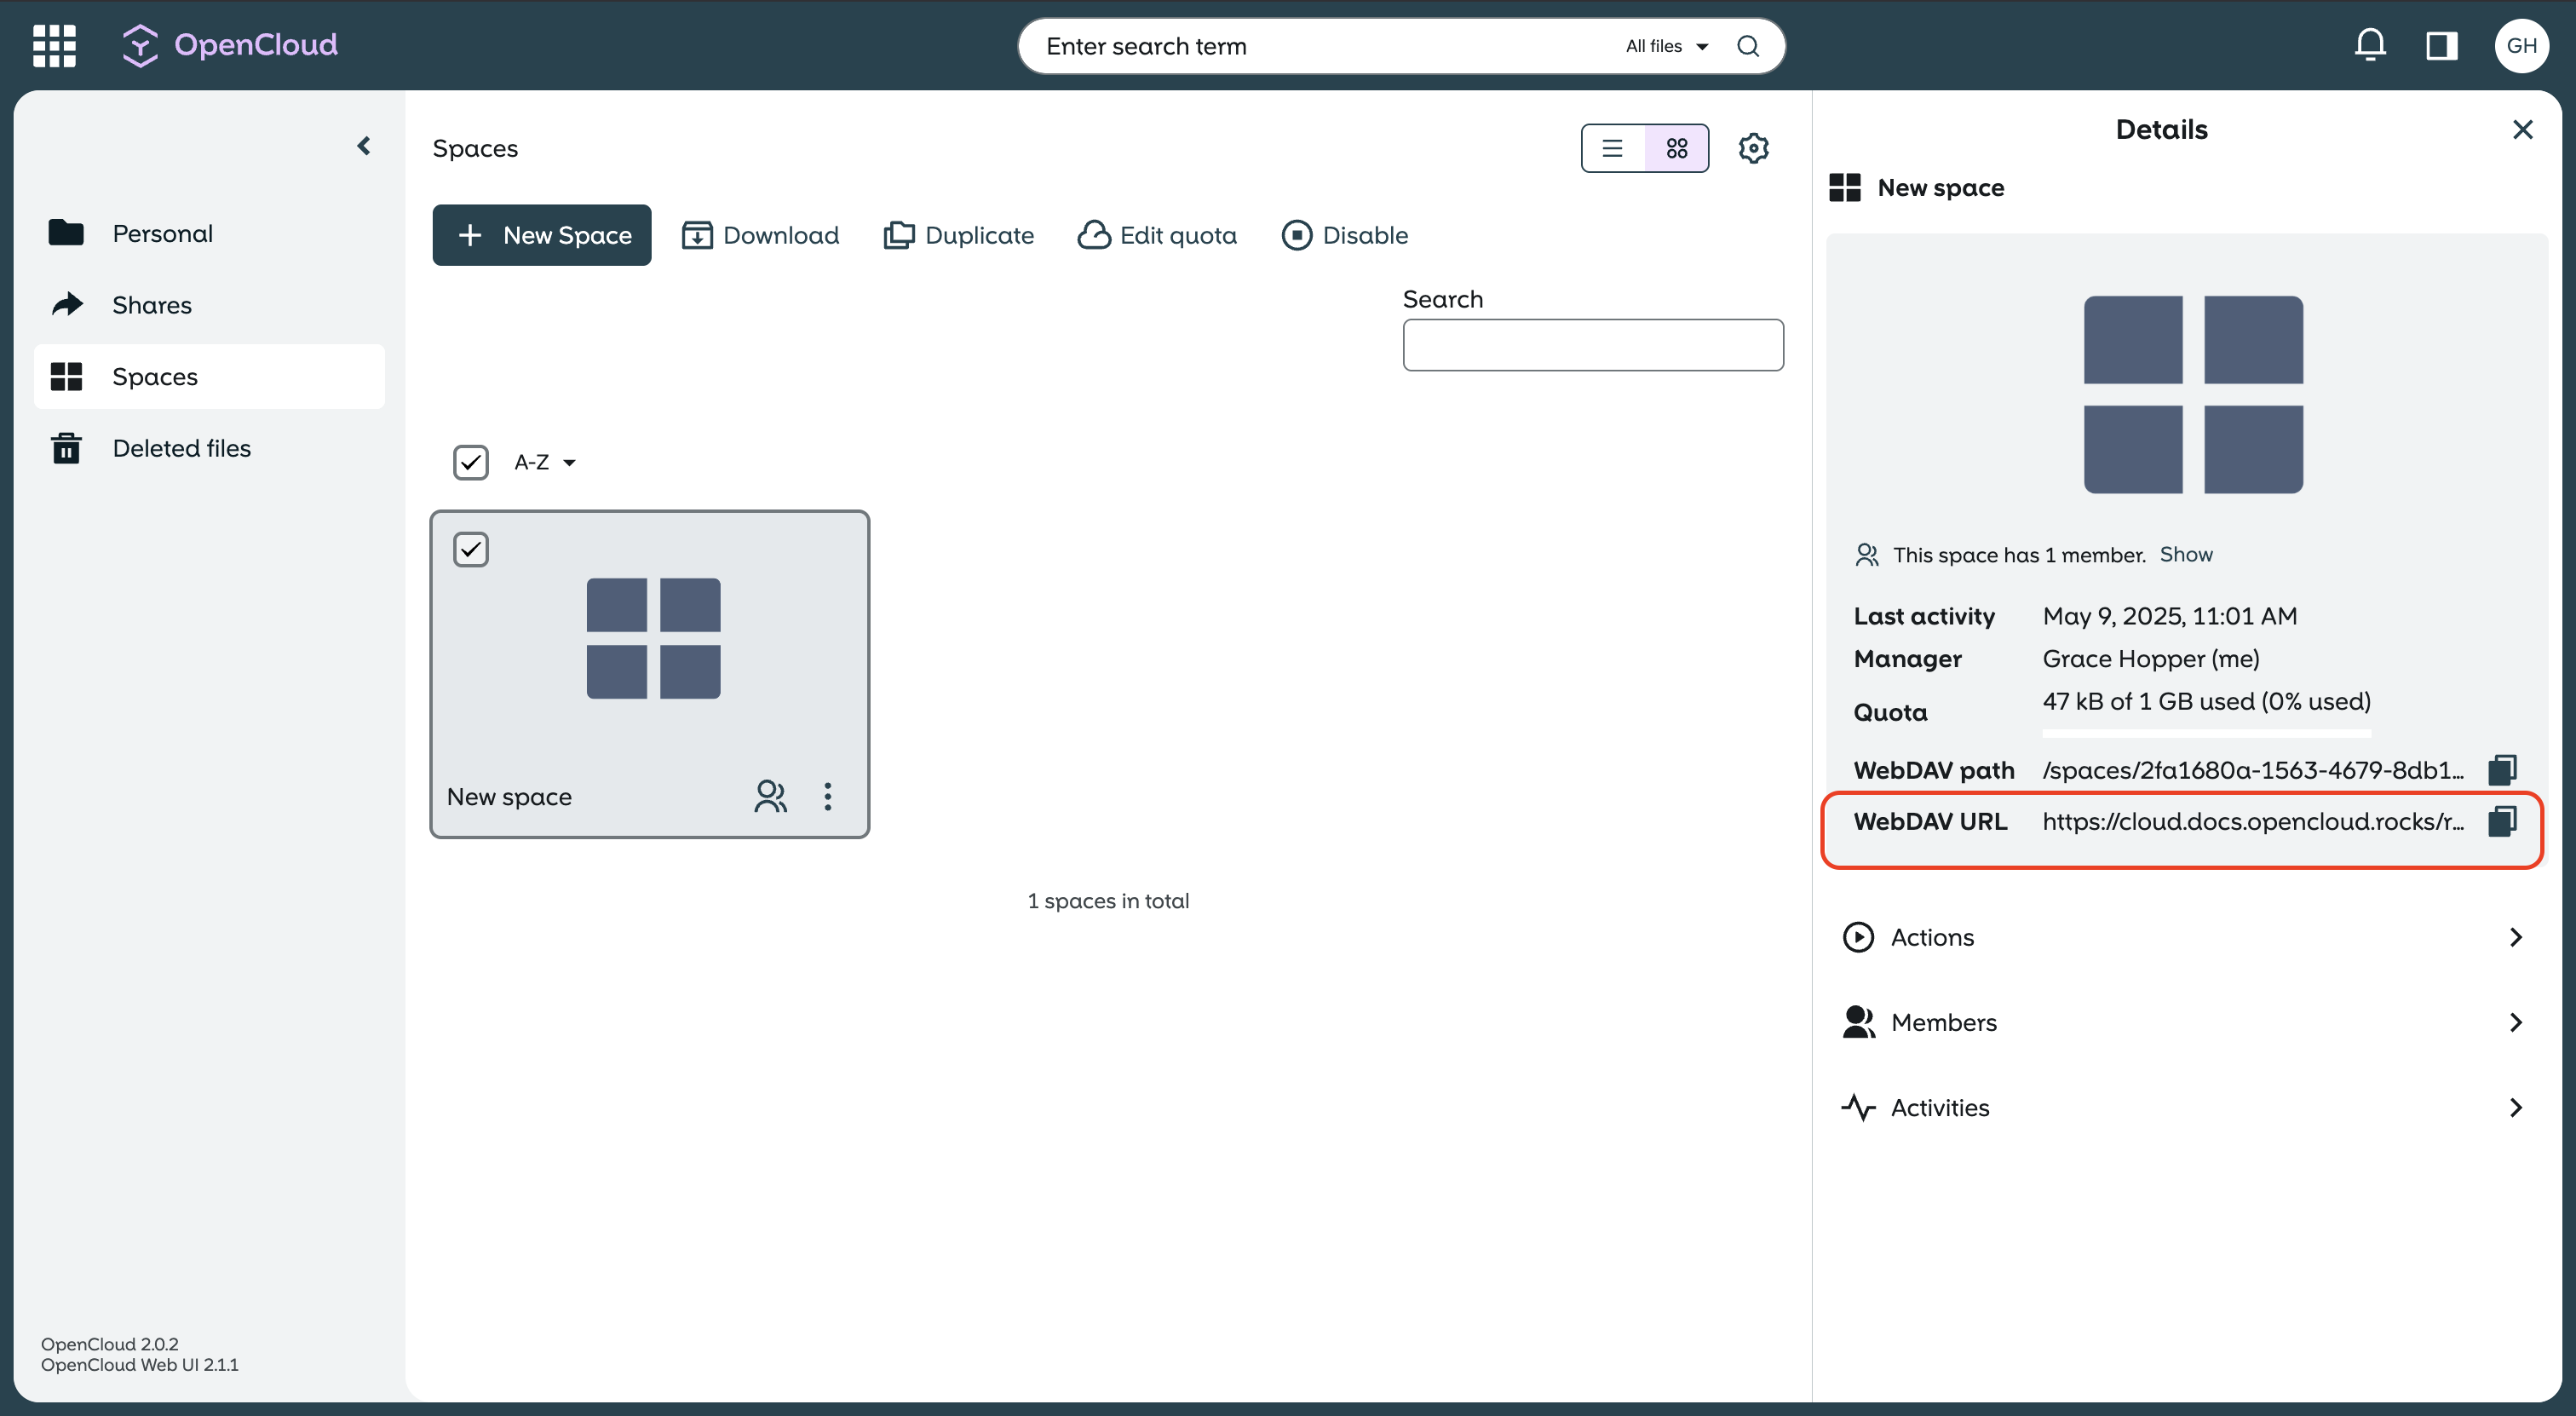
WebDAV-URL abrufen
Öffne das Info-Panel deines Spaces in der OpenCloud-Weboberfläche.
Du findest dort einen Abschnitt „WebDAV“ – kopiere die vollständige URL. Diese sieht beispielsweise so aus:
https://cloud.example.de/remote.php/dav/spaces/12345678-abcd-efgh-ijkl-987654321000/
Verbindung via WebDAV herstellen
Stelle nun die Verbindung zu deinem Gerät über die WebDAV-URL her:
- Benutzername: dein OpenCloud-Benutzername
- Passwort: dein App-Token (oder Passwort, falls erlaubt)
Du kannst je nach Betriebssystem unterschiedliche Clients verwenden:
Windows
- Öffne den Datei-Explorer → Klicke auf „Dieser PC“ → Wähle „Netzlaufwerk verbinden“
- Gib die WebDAV-URL ein
- Authentifiziere dich mit Benutzername und App-Token
macOS
- Wähle im Finder „Gehe zu“ > „Mit Server verbinden…“
- Gib die WebDAV-URL ein
- Melde dich mit deinen Zugangsdaten oder dem App-Token an
Linux
- Nutze die Funktion „Mit Server verbinden“ deines Dateimanagers
- Format der URL:
davs://cloud.beispiel.de/remote.php/dav/spaces/<SPACE-ID>/
Nach erfolgreicher Verbindung verhält sich dein Space wie ein normaler Ordner.
- Wenn dein WebDAV-Client OIDC unterstützt, ist ein App-Token eventuell nicht erforderlich
- Verwende immer
https://für einen sicheren Zugriff - App-Tokens können jederzeit in den Kontoeinstellungen widerrufen werden